

You notice it from the driveway first. The panels look hazy after a dry Santa Ana week, and a dark line of dust has collected along the lower frames. Near the coast, salt film may be sitting on the glass even when the array looks only slightly dull. A few bird droppings or sprinkler spots can block more light than their size suggests.
To clean solar panels on a roof safely, stay on the ground whenever you can: rinse cool panels early in the morning with a soft brush on a water-fed pole, use purified or low-mineral water, and never pressure wash, walk on the panels, or climb in wind. Unger’s safety instructions for cleaning PV systems with water-fed poles are a good baseline before any rooftop work.
Cleaning rooftop solar panels isn’t mainly a scrubbing chore. It’s a decision about soiling, access, roof conditions, and electrical safety. The right method removes contamination without scratching the glass, forcing water into seals, or putting you at fall risk. The wrong method can leave mineral rings, damage coatings, or turn a manageable maintenance job into a roof repair.
Table of Contents
- Why Roof Solar Panels Get Dirty in the First Place
- How Much Soiling Actually Costs You
- Gathering Tools and Spotting Safety Risks Before You Climb
- The Cleaning Process From Hose Rinse to Final Wipe
- How Often to Clean Based on Where You Live
- When DIY Stops Making Sense and a Pro Is Worth It
- Key Takeaways and Common Questions
Why Roof Solar Panels Get Dirty in the First Place
A coastal homeowner in Ventura may see several kinds of contamination on the same array. Dust carried inland during a dry wind event settles into the panel texture, pollen adds a fine film, and salt aerosols bond to the glass during humid coastal cycles. If birds nest on the roof, droppings collect near the upper edges and can dry into stubborn patches. A nearby sprinkler may add another problem, leaving mineral spots that become more difficult to remove as the glass heats and dries.
The lower edge usually tells the story. Rain and rinse water move dirt downhill, where it gathers against the frame and dries in a concentrated strip. Low-tilt installations hold more of that residue because water and debris don’t move away as quickly as they do on steeper arrays. Many Southern California tract homes have modest roof pitches, so panels may need more attention than a steeply mounted system in an open location.
Surface film versus functional contamination
Not every dull-looking panel needs immediate washing. A light cosmetic film may have little practical effect, while an opaque bird deposit, thick dust band, salt crust, or baked mineral spot can block light where it sits. The difference matters because aggressive cleaning creates its own risk. You shouldn’t climb onto a roof merely to remove a faint haze if the array remains productive and safely accessible from the ground.
Look for patterns rather than judging from one angle:
- Lower-edge buildup: A distinct dirty band along the frame indicates repeated runoff and drying.
- Bird deposits: White or dark opaque spots deserve targeted soaking instead of hard scrubbing.
- Salt haze: Coastal film often looks cloudy rather than granular and may return quickly after cleaning.
- Sprinkler spotting: Circular mineral marks usually point to irrigation overspray, not ordinary dust.
Practical rule: Inspect the array after dry wind, heavy bird activity, or visible sprinkler overspray. Let the site determine the cleaning decision, not the panel’s age alone.
How Much Soiling Actually Costs You
Soiling has a measurable production cost, but the cost varies sharply by climate. The IEA PVPS summary on photovoltaic soiling losses estimates that dust and snow caused at least 3% to 4% of annual PV energy loss worldwide in 2018, representing roughly €3 billion to €5 billion in economic losses. The same source projected 4% to 5% of energy production and €4 billion to €7 billion in annual losses by 2023.
Those global figures aren’t a bill for every Southern California homeowner. They show why a site-specific inspection matters. NREL reports that semi-arid areas such as Southern California typically experience annual soiling losses of 5% or less, although peak losses can exceed 15%. Desert regions can reach 20% or more annually and as much as 80% after dust storms, according to the same IEA PVPS source.
A useful decision rule
A thin layer of dust in a semi-arid neighborhood may sit near the ordinary annual-loss range, while a heavy event can create a much larger short-term penalty. Coastal salt, pollen, bird droppings, and mineral residue also behave differently from loose dust. A panel can look acceptable from the street while a concentrated deposit is blocking light over part of its surface.
| Environment | Typical loss | Frequency of visible soiling |
|---|---|---|
| Semi-arid Southern California | Typically 5% or less annually, with higher peaks after events | Often visible after dry wind or extended dry weather |
| Desert conditions | 20% or more annually in some locations | Frequently visible, with severe buildup after dust storms |
| Worldwide PV fleet | At least 3% to 4% annually in the IEA PVPS estimate for 2018 | Varies widely by dust, snow, rainfall, and site conditions |
The solar panel cleaning value guide can help frame the question around output rather than appearance. In practice, compare recent production with your normal weather-adjusted pattern, then inspect the array. If output drops while sunlight conditions remain similar and the glass has obvious deposits, cleaning becomes easier to justify.
Don’t translate a percentage loss into dollars using an invented utility rate. Your electricity price, system size, shading, battery behavior, and export agreement determine the actual value of recovered production. The practical conclusion is simpler: coastal and high-dust homes reach the cleaning threshold sooner, while cleaner, wetter locations can often wait longer.
Gathering Tools and Spotting Safety Risks Before You Climb
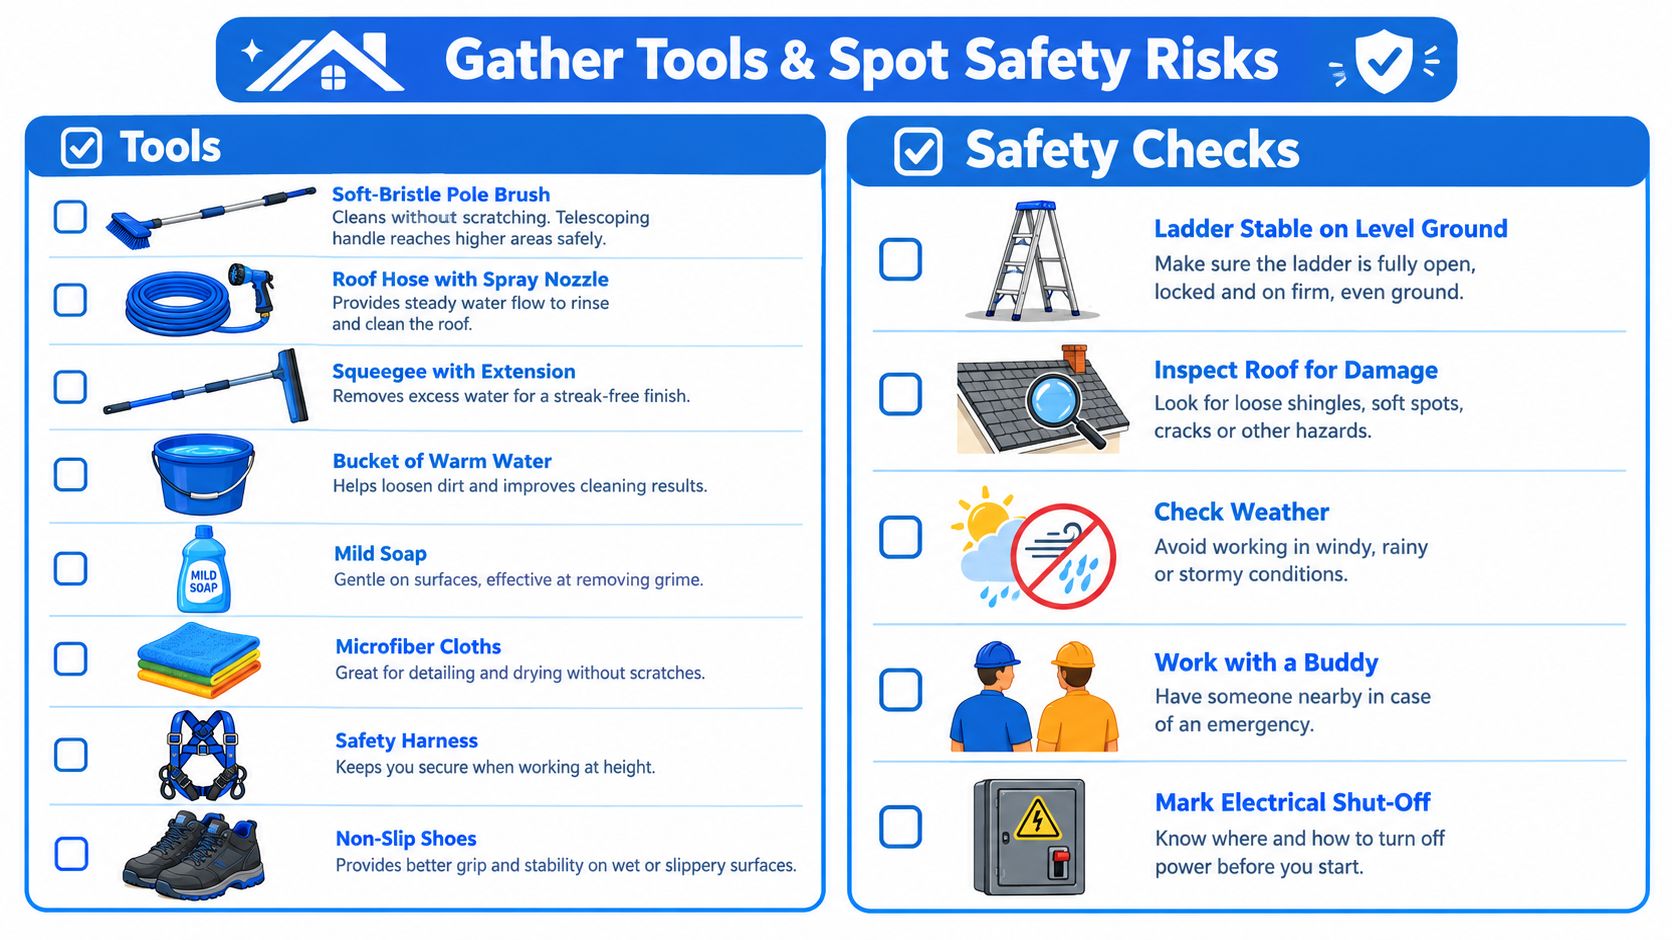
Treat the roof as a workplace, not an extension of the backyard. The basic cleaning tools are simple, but safe access is not. A soft-bristle brush on a telescoping pole, a garden hose with a gentle nozzle, a non-abrasive sponge for isolated spots, and a bucket of clean water are usually enough for light contamination. A squeegee with a suitable extension can help remove rinse water, especially where hard water would otherwise leave rings.
Check the hazards before the glass
Hot glass is more than a streaking problem. Midday panels can become hot enough to cause burns, and cold rinse water can evaporate too quickly on the surface. Wet glass and wet roof tiles also become slick, while the wiring behind the array can remain electrically hazardous even when the inverter is switched off.
Before setting a ladder, check the entire route from the ground to the array:
- Access: Use a stabilized extension ladder on level ground, with a spotter present. A ladder leaning against an unstable surface isn’t a cleaning plan.
- Fall protection: Sloped roofs may require anchors, a harness, and appropriate training. A pole won’t protect you if you lose footing.
- Electrical condition: Stop if you see cracked conduit, damaged cables, loose connectors, or broken glass. Don’t touch the damaged area.
- Weather: Avoid wind, rain, and rapidly changing conditions. Santa Ana gusts can make a long pole difficult to control.
- Footwear: Wear soft rubber soles with reliable grip, and never treat the panel surface as a walking path.
Work at dawn or late in the day, when the modules are cool and the roof is dry. If you can’t safely reach the array from the ground or from a properly protected access point, the correct tool is a phone, not a longer ladder.
The Cleaning Process From Hose Rinse to Final Wipe
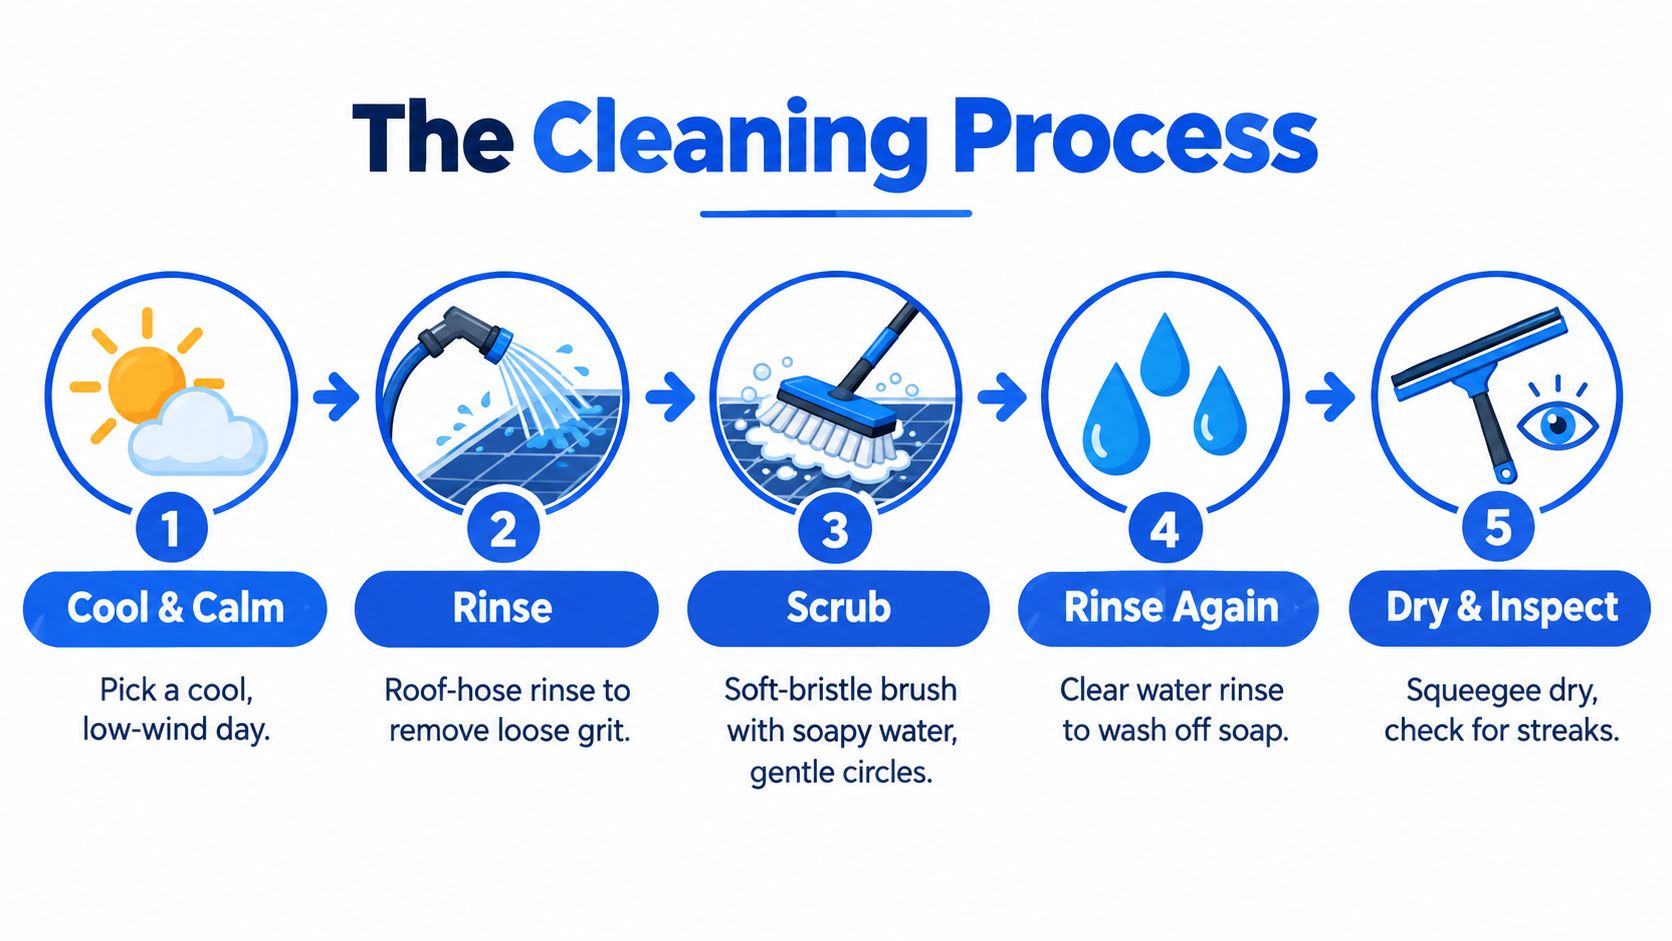
Start with a cool, low-wind window and confirm the system shutdown procedure in the installer or manufacturer instructions. Turning off the inverter doesn’t make every part of a rooftop array harmless, so avoid exposed wiring and never open electrical enclosures during cleaning. If the panels are reachable from the ground, keep your feet there. If roof access is necessary, use the safety equipment appropriate for the pitch and surface.
Begin with a gentle roof-hose rinse from the upper portion of the array toward the lower edge. The first rinse should remove loose dust, grit, pollen, and ash before a brush touches the glass. Don’t use a pressure washer. High-pressure water can stress seals, wiring, and frame edges, and it can drive water where it shouldn’t go.
Apply clean water with a soft-bristle brush and work in straight strokes along the panel length. The goal is to loosen salt film and pollen while moving contamination toward the lower edge, not to grind loose particles across the glass. The solar panel cleaning brush and pole guide covers the equipment choice, but the technique matters just as much as the pole itself.
Handle stubborn deposits without forcing them
Bird droppings should be soaked for a few minutes before you lift them gently with a non-abrasive sponge or soft brush. Don’t attack a dry deposit with a scraper, scouring pad, hard brush, or aggressive household cleaner. Those shortcuts can scratch glass or affect surface coatings, and pressure won’t make the contamination safer to remove.
Sprinkler spots need a different response. A final deionized or distilled rinse helps limit mineral rings after hard-water overspray. If you don’t have purified water, rinse thoroughly and use a clean squeegee before droplets dry. Pay attention to the frame and lower edge, because calcium-laden runoff can streak the next panel and leave the array looking dirty again.
After the final rinse, pull the squeegee in controlled passes and wipe the frame edges with a clean cloth. Check the array from several angles for remaining haze, streaks, and opaque deposits. Confirm that the inverter has returned to its normal operating state before you leave, and investigate any unexpected production or fault indication rather than assuming the cleaning caused no issue.
How Often to Clean Based on Where You Live
A fixed seasonal rule misses the variables that matter most. Roof pitch, rainfall, salt exposure, dust load, and contamination type determine how quickly an array needs attention. A steep panel can shed loose debris during rain, while a low-tilt panel can retain a dirty band along its lower edge. A home near the Pacific or a harbor also faces a different problem from a property farther inland, because salt film can bond to glass during repeated coastal humidity cycles.
For a coastal home, inspect the panels monthly, especially after dry weather and marine haze. A cleaning interval of every few months may make sense when salt, bird activity, or irrigation overspray is obvious. Inland homes should receive a visual check after major wind events, because dry Santa Ana dust can settle quickly and cement to the surface before the next meaningful rinse.
Rain helps, but it isn’t automatically a complete wash. Rainwater may move loose dust while leaving mineral film, bird deposits, or a concentrated dirty edge behind. Watch the production record after unusual weather, then inspect the glass before booking a wash.
| Location profile | Tilt range | Cleaning interval |
|---|---|---|
| Coastal home with salt exposure | Low to moderate | Inspect monthly, clean when film or deposits return |
| Inland home exposed to Santa Ana dust | Low to moderate | Inspect after wind events and clean when buildup is visible |
| Steep array in a relatively clean setting | Steeper pitch | Often can go longer between washes if inspection stays clear |
| Dusty valley or low-tilt installation | Low or nearly flat | Plan more frequent inspections and targeted cleaning |
The most useful shortcut is to check production after weather extremes and clean when monthly output drops by 5% to 7%, provided your comparison accounts for similar sunlight conditions. That threshold appears in the site guidance for this article, but production data should support, not replace, a physical inspection. A low-tilt array with visible salt or dust needs attention sooner than a steep, clean array on the same street.
When DIY Stops Making Sense and a Pro Is Worth It
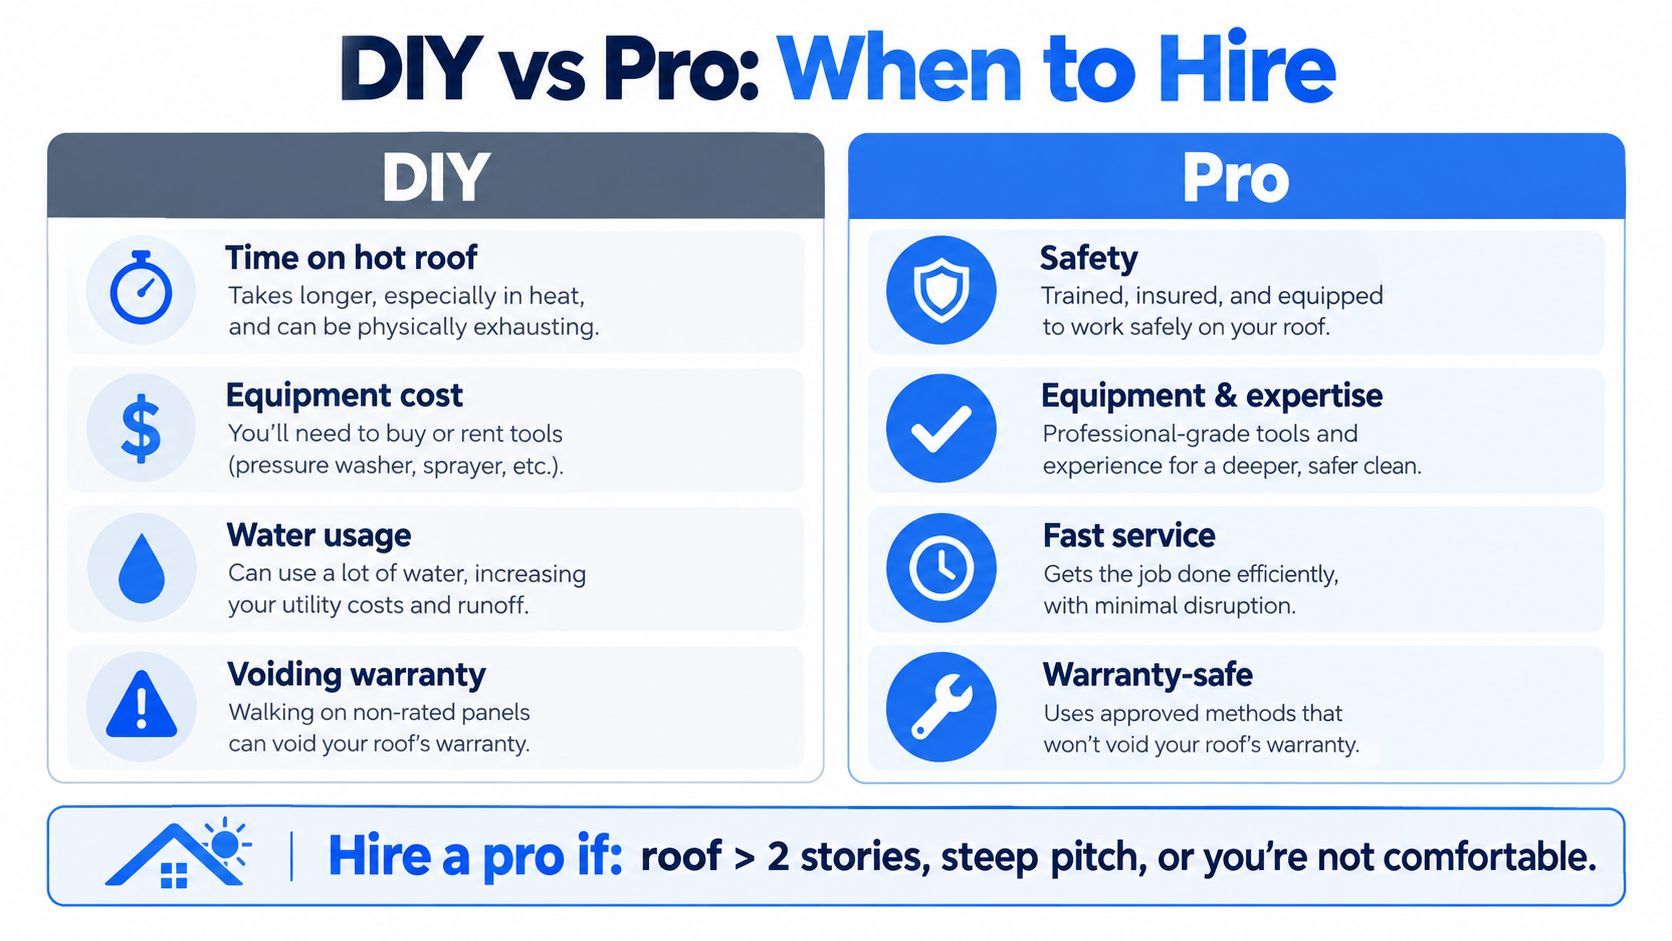
DIY cleaning makes sense only when the access is genuinely safe. A single-story home with a mild roof pitch, stable ground access, no damaged components, and panels reachable from a pole may be manageable. Even then, the work takes time, uses water, and can become uncomfortable once the roof heats up.
The calculation changes on a two-story home, a steep roof, or fragile tile. Walking on roof tiles can crack them, and walking on panels can damage glass, frames, or mounting points. Some modules aren’t rated for foot traffic at all. Manufacturers may also specify approved cleaning methods and restrict detergents, so check the warranty documents before introducing soap or chemicals.
Use clear stop signs
The following conditions end the DIY discussion:
- Height: The array is on a multi-story or steep roof and can’t be reached safely from the ground.
- Roof material: Tile, brittle roofing, loose flashing, or signs of water intrusion make foot access risky.
- Electrical red flags: You see damaged wiring, cracked glass, exposed connectors, or unexplained inverter faults.
- Biological growth: Moss or persistent green growth suggests moisture may be collecting beneath or around the array.
- Personal comfort: You’re straining, rushing, working alone, or using a ladder that isn’t properly stabilized.
A professional crew brings fall-protection procedures, panel-safe tools, purified water options, and experience working around roofing and electrical components. That doesn’t mean every job requires a service visit. It means the price of cleaning should be compared with the cost of a fall, cracked tile, damaged panel, or warranty dispute.
For homeowners who want a service rather than roof access, Aloha Window Bros solar panel cleaning service is one local option. The company describes inspections, soft tools, purified-water cleaning, and no pressure washing or abrasives as part of its solar panel work.
Key Takeaways and Common Questions
Safe rooftop cleaning follows a controlled order: inspect, cool the panels, rinse loose grit, brush gently, rinse again, remove standing water, and check production. Coastal homes and low-tilt arrays generally need closer observation than steep arrays in cleaner settings. If the roof, wiring, glass, or access makes you hesitate, hire someone rather than improvising.
Field questions homeowners ask
Should I clean during a Santa Ana wind event?
No. Wind makes ladder, harness, hose, and telescoping-pole work less predictable. Wait until conditions settle, then inspect for deposited dust before choosing a cleaning day.
Can roof moss spread beneath panels?
It can signal persistent moisture or poor drainage around the array. Don't pull at growth or push tools under the frame. Have the roof and mounting area inspected.
What if I find a crack while cleaning?
Stop immediately, keep water and tools away from the damaged area, and contact the installer or a qualified solar professional. Don't scrub over cracked glass or touch nearby wiring.
Is rainwater enough near the beach?
Not always. A home close to the coast may still retain salt haze, bird deposits, and mineral residue after rain. Inspect the lower edges and compare production before deciding.
Can I walk on the panels?
No, unless the manufacturer specifically rates them for foot traffic. Even then, follow the installation guidance. A panel is a working electrical component, not a step.
For Ventura County and Santa Barbara County homeowners, Aloha Window Bros provides solar panel cleaning alongside window, screen, frame, and sill cleaning, with free on-site estimates. If coastal salt, Santa Ana dust, bird droppings, or difficult roof access are affecting your array, see our solar panel cleaning service or request a free quote to discuss a safe cleaning approach.